Unpaid invoice and prepayment initial balances
Entering the initial balances of unpaid invoices and prepayments is only necessary if you want to differentiate the balances of your clients and vendors. Having invoices and prepayments linked to clients and vendors makes netting easier later on.
To enter unpaid invoices and prepayments initial balances follow these simple steps:
- Insert clients and vendors in SmartAccounts
- Upload the initial balances file
- Check that the data is correct and save
Client and vendor data entry
Clients and vendors can be conveniently imported to SmartAccounts from a file or inserted manually under ‘Sales/Purchases’ – ‘Clients’ and/or ‘Sales/Purchases’ – ‘Vendors’.
NB! Please note that clients and vendors must exist in the system before you import their initial balances.
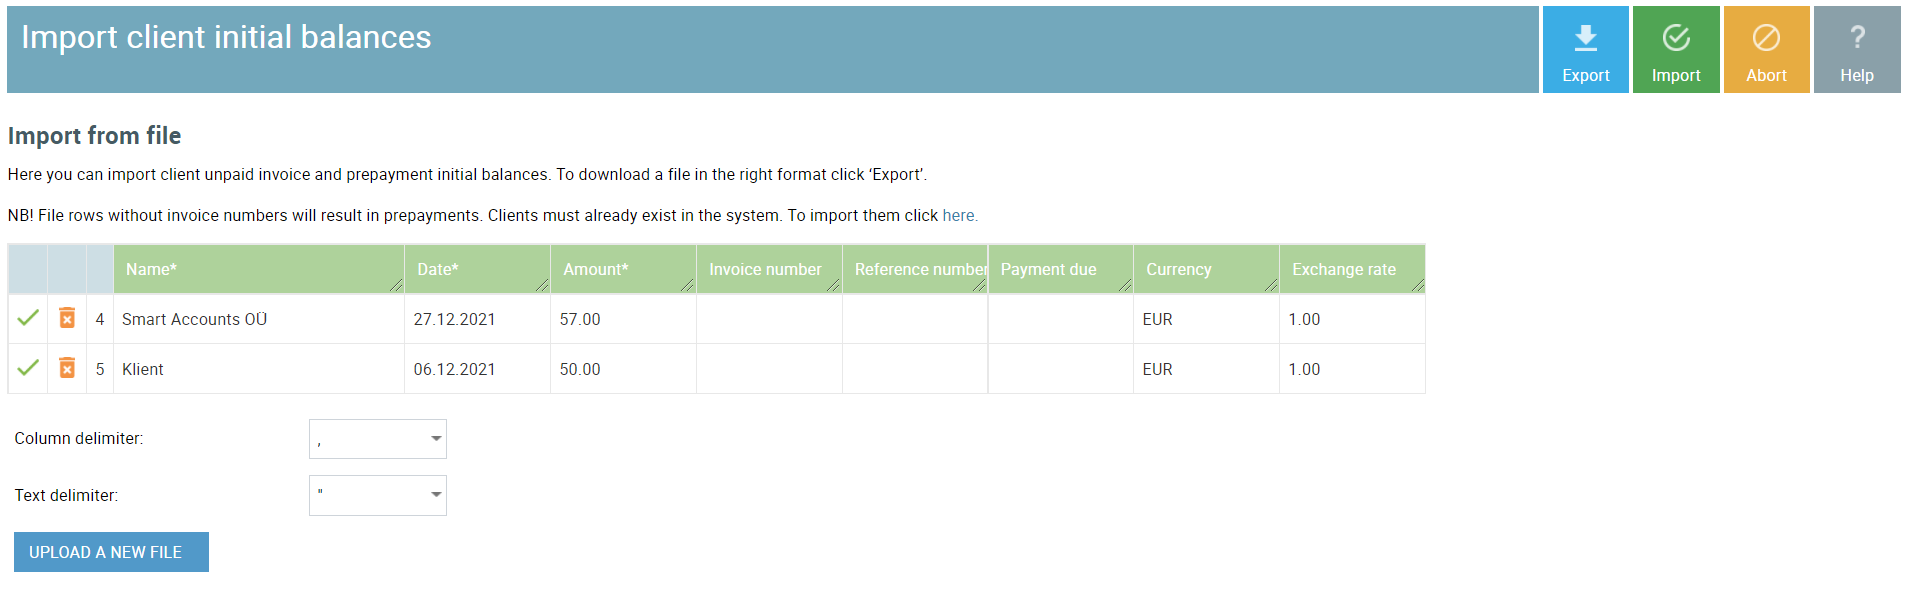
Initial balances file upload
After the clients and vendors are inserted into the system, the next step is to fill out the initial balances file and upload it to SmartAccounts. Clients and vendors must have separate initial balances files that can be uploaded under ‘Sales/Purchase’ – ‘Clients’ and/or ‘Sales/Purchases’ – ‘Vendors’.
Clients
To download a file in the right format click ‘Sales/Purchases’ – ‘Clients’ – ‘More’ – ‘Initial balances’ – ‘Export’.
Open the downloaded file and fill it out with the following data:
- Client’s name – mandatory field
- Date – mandatory field
- Amount – mandatory field
- Invoice number – in case of an invoice enter invoice number/ in case of prepayment leave the field blank
- Reference number
- Currency
- Exchange rate

When the file is filled out, save and import it on the same page (‘Sales/Purchases’ – ‘Clients’ – ‘More’ – ‘Initial balances’).
By clicking the ‘Import’ button the invoices will be saved automatically.
Vendors
To download a file in the right format click ‘Sales/Purchases’ – ‘Vendors’ – ‘More’ – ‘Initial balances’ – ‘Export’.
Open the downloaded file and fill it out with the following data:
- Vendor name – mandatory field
- Date – mandatory field
- Amount – mandatory field
- Invoice number – in case of an invoice enter invoice number/ in case of prepayment leave the field blank
- Reference number
- Currency
- Exchange rate
When the file is filled out, save and import it on the same page (‘Sales/Purchases’ – ‘Vendors’ – ‘More’ – ‘Initial balances’).
By clicking the ‘Import’ button the invoices will be saved automatically.
NB! Note that the data entered with the file does not create double balances in your General Ledger. All unpaid invoices and prepayments will be saved with the sequence number of 0.
Data correction
If your data needs correcting we suggest exporting the initial balances file again and making the changes directly in the file. Another option is to edit the saved invoice (‘Sales/Purchases’ – ‘Sales invoices’) or bank payment (‘Payments’ – ‘Bank payments’) manually.
NB! If you import again, the saved documents will be overwritten with the latest data.
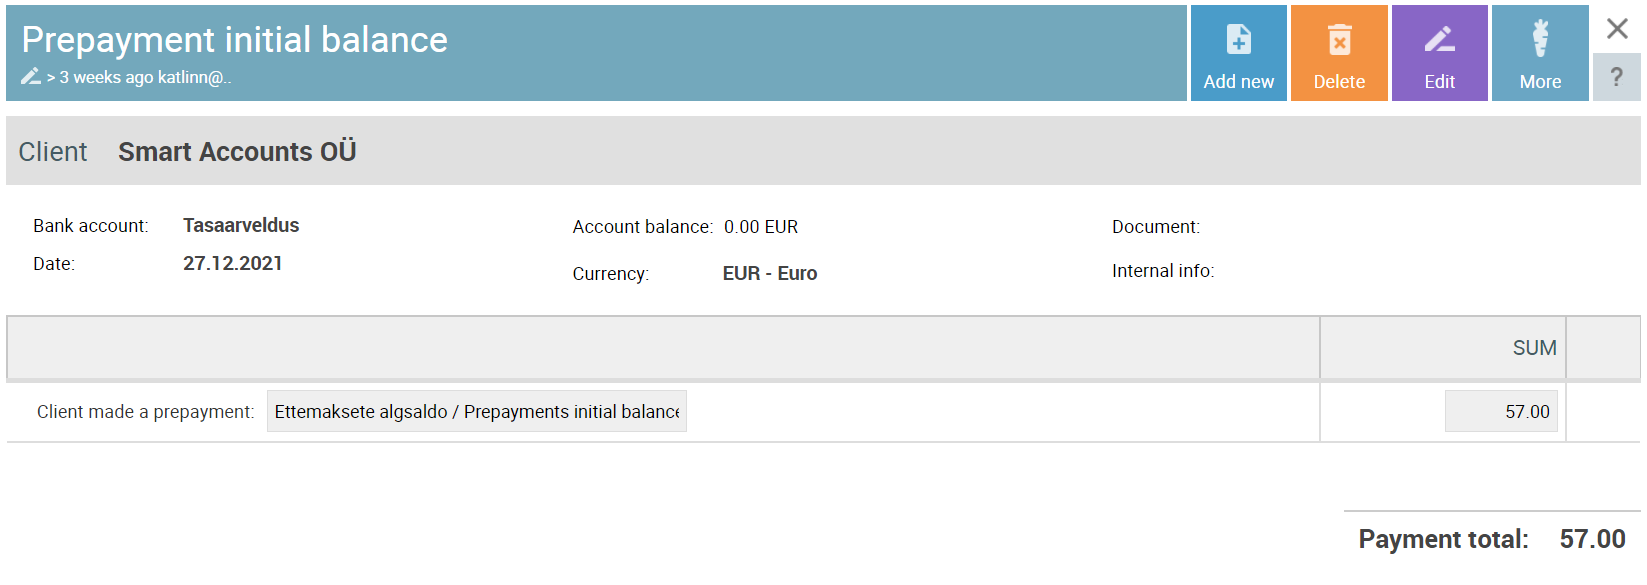
Insert prepayment initial balances manually
In addition to importing prepayment initial balances from the file, it’s also possible to insert them manually under ‘Payments’. To enter prepayments manually, open ‘Payments’ – ‘Bank payments’ – ‘More’ – ‘Add prepayment initial balance’.
More
Unpaid invoice and prepayment initial balances